 One sure-fire way to speed up your Internet connection is to replace your ISP's slow DNS server with a third party DNS resolver like OpenDNS. Considered by many as one of the best DNS resolution services, OpenDNS is free and is really very easy to set up.
If you want further explanation about OpenDNS or if you are still not convinced to use it, perhaps you should go HERE first.
If you are ready to set up OpenDNS on your Ubuntu desktop, just follow these simple instructions:
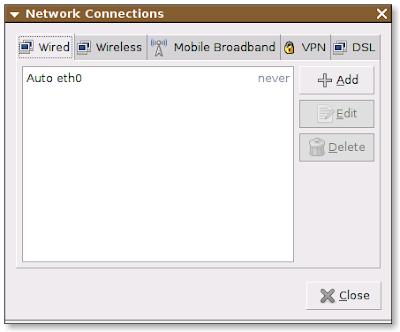
1. Right-click on ‘Network Icon’ (located at top-right panel by default) and click on ‘Edit Connections’ to open Network Connections Manager.

2. Choose the type of connection you have. For this example, we will use ‘Wired’.
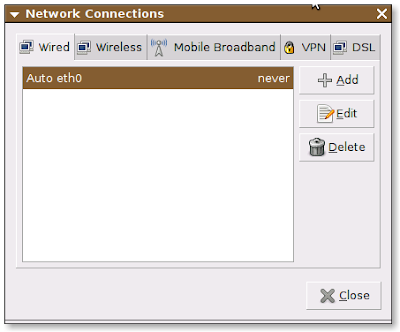
3. Under ‘Wired’, highlight ‘Auto etho’ and click on ‘Edit’.

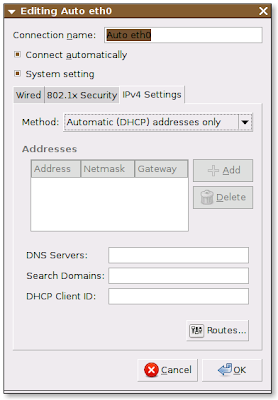
4. Inside 'Editing Auto etho' window, click on ‘IPv4 Settings’ tab.
5. Under ‘IPv4 Settings’, change the ‘Method’ to Automatic (DHCP) addresses only.

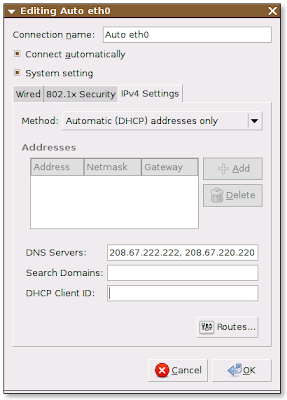
6. Put these nameserver addresses as your ‘DNS Servers’: 208.67.222.222, 208.67.220.220
7. Click ‘OK’ and you are done setting OpenDNS on Ubuntu.


